
Found a small split in your TPE sex doll and worried you have ruined her? Don’t be. A minor tear in thermoplastic elastomer (TPE) is one of the easiest repairs you can do yourself, and you can fix most of them with a bottle of TPE glue and about 20 to 30 minutes of hands-on work.
Table of Contents
At SweetieDoll, we handle TPE repairs on returned and refurbished dolls all the time, so we know exactly where these little splits happen and how to close them cleanly. This guide walks you through the glue method step by step, the exact cure times to wait, and a heat-fusion option for slightly deeper splits. You will also learn the mistakes that turn a two-inch fix into a permanent scar, plus how to keep tears from coming back.
Here is the short version: clean and degrease the tear, apply a thin line of TPE-specific glue inside the split, press the edges together for 30 to 60 seconds, then let it cure for several hours before use. Allow up to 24 hours before you stretch or stress that area. The rest of this guide fills in the details that most repair posts leave vague.
Is Your Doll TPE or Silicone?
Check your material before you buy any glue, because TPE and silicone need completely different adhesives. TPE is a soft, oil-bearing blend of plastic and rubber that softens when heated, while silicone is a firmer, heat-stable material that does not melt. Using the wrong glue is the number one reason home repairs fail.
How to Tell TPE from Silicone
Most bodies sold as an affordable “realistic” doll are TPE. If you are unsure, use this quick comparison.
| Clue | TPE | Silicone |
|---|---|---|
| Feel | Softer, slightly tacky, oily to the touch | Firmer, dry, smooth |
| Smell | Faint plastic or rubber scent | Almost odorless |
| Oil bleed | Releases oil over time, needs powdering | No oil bleed |
| Right glue | TPE solvent glue or TPE paste | Silicone adhesive (Sil-Poxy type) |
| Typical price | Lower cost tier | Premium tier |
Why the Material Changes Your Repair Method
The difference comes down to heat. TPE softens and re-fuses when warmed, which is why a heat gun or soldering iron can literally melt two torn edges back into one piece. Silicone has no melting point in the same way, so heat will not fuse it and you must rely on a chemical silicone adhesive instead. That single property, covered in more detail below, shapes every step that follows. This article focuses on TPE; if you own a silicone doll, skip to the silicone note near the end.
What You’ll Need to Fix a TPE Tear
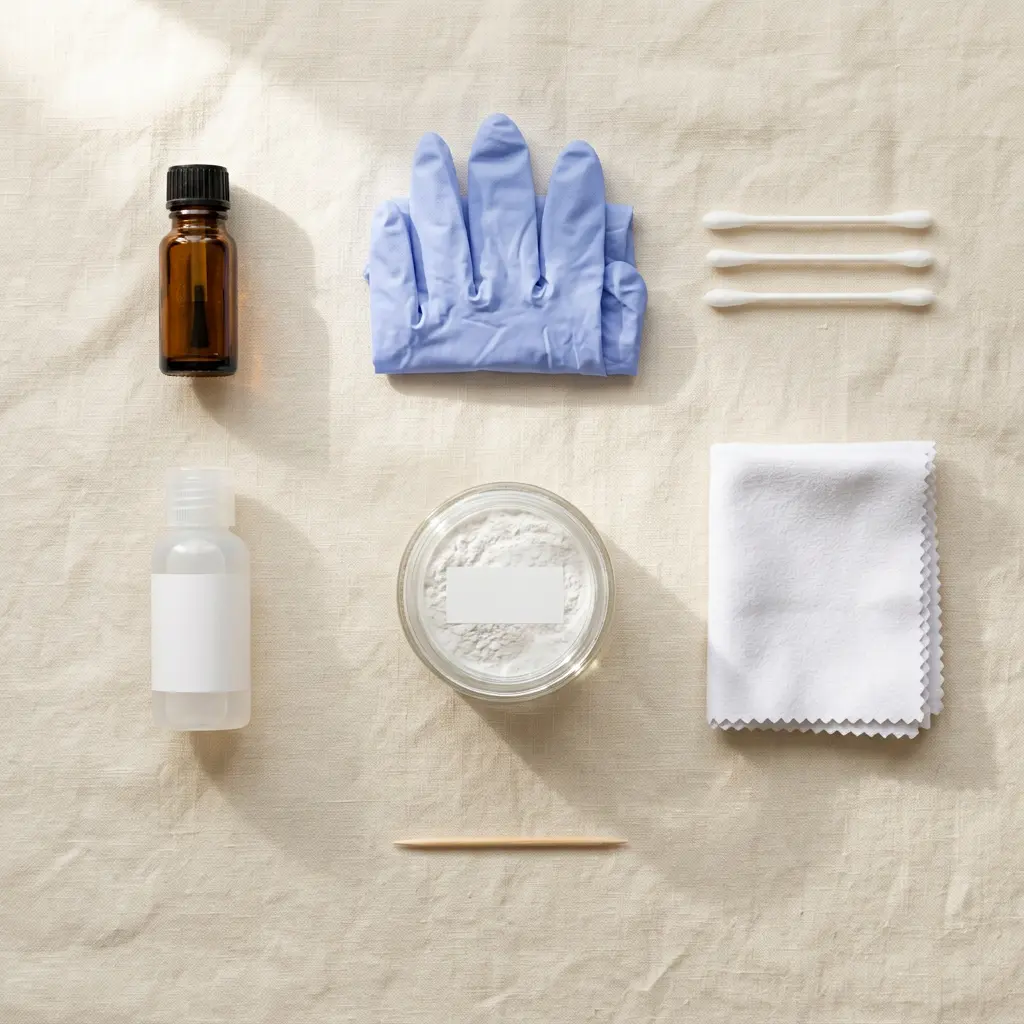
Gather these supplies before you start so you are not hunting for a cotton swab mid-repair. Everything here costs well under $50 total, far less than the $200 to $600 you would spend shipping a doll back to a factory.
Core Repair Supplies
- TPE-specific glue: a solvent-based adhesive made for TPE, usually sold in a 15 mL bottle with a brush cap for around $25.
- 99% isopropyl alcohol: to clean and degrease the tear so the glue can bond.
- Cotton swabs or a toothpick: for applying a thin, controlled line of glue.
- Nitrile gloves: to keep skin oils and solvent off your hands.
- Renewal powder or cornstarch: to restore the soft, matte skin feel after curing.
- A lint-free cloth: for cleaning and for smoothing the seam.
Optional Tools for Deeper Tears
- TPE paste (filler): a thicker compound for gouges or missing material, roughly $50 to $60 for a 50 mL jar.
- A temperature-controlled heat gun or soldering iron: for the fusion method on stubborn splits.
- Mineral oil or baby oil: to massage back into the repaired zone and reduce whitening.
- Masking tape or a wrapped bottle: to hold hard-to-reach edges (like an entry-point seam) in place while they set.
For everyday drops and thin surface splits, the core supplies are all you need. Save the paste and heat tools for tears deeper than about a quarter inch (0.6 cm).
How to Repair a Small Tear in Your TPE Doll, Step by Step
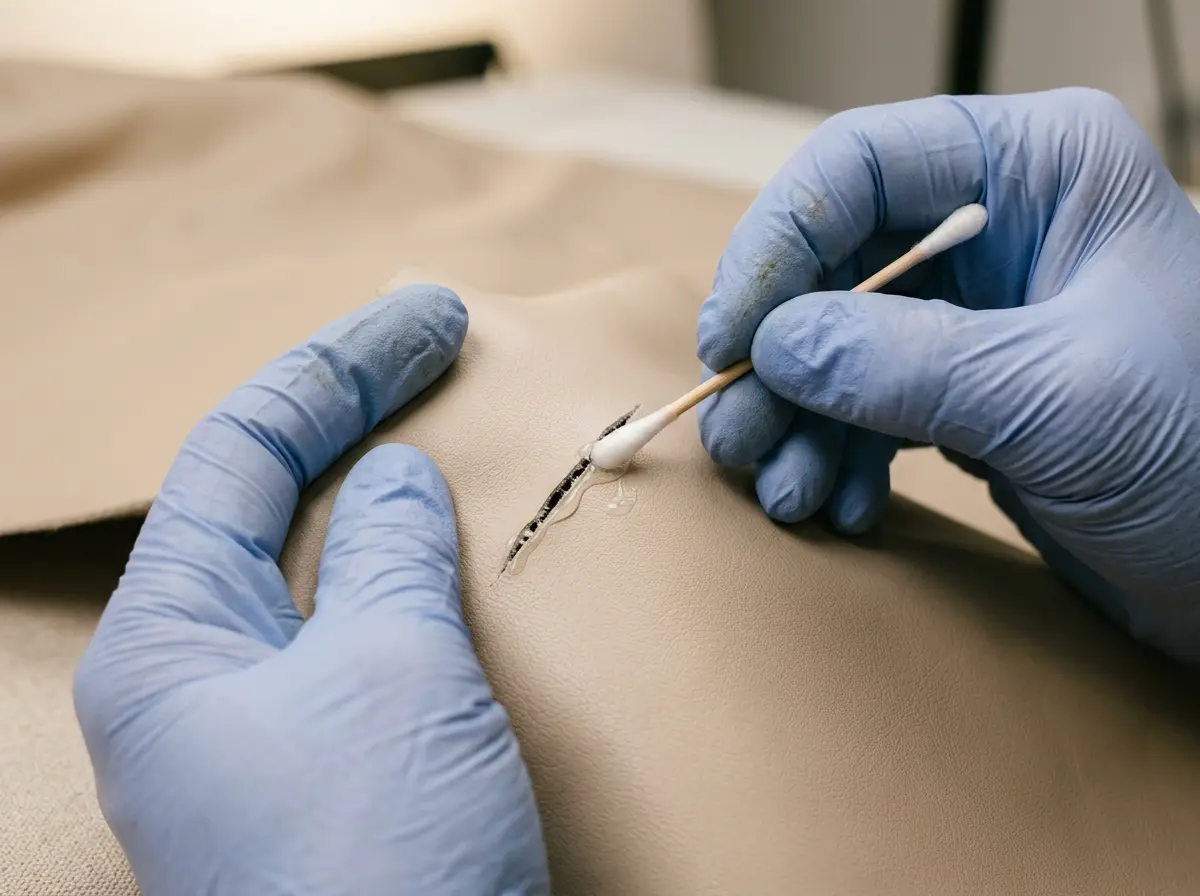
You can close a small TPE tear in five steps, with about 20 to 30 minutes of hands-on work plus curing time. Follow the order below exactly, because skipping the cleaning step is what causes most bonds to peel apart later.
- Clean and degrease the tearWash the area with mild soap and water, pat it dry, then wipe inside and around the split with99% isopropyl alcoholto degrease it. Let it air-dry for about 15 minutes. TPE releases oil, and any residue left behind will stop the glue from gripping.
- Line up the edgesGently hold the torn edges together so they meet cleanly. For a seam near an entry point, insert a wrapped bottle or a dilator to hold the shape, or use a strip of masking tape on skin that is hard to pinch.
- Apply the TPE glueUsing a cotton swab or toothpick, brush a thin layer ofTPE glueonto both inner faces of the tear. Do not overfill. The glue works as a solvent that lightly melts the surface, so too much will widen the wound instead of closing it.
- Press and holdPress the edges together firmly and hold for 30 to 60 seconds. A thicker brush-cap glue may need a full 1 to 2 minutes. Keep steady, even pressure so the seam sits flush rather than ridged.
- Cure and finishLeave the repair untouched to set. Wait several hours before any use, and allow a full 24 hours before you stretch or stress the spot. Then smooth the seam with a warm cloth, massage in a little mineral oil, and dust with renewal powder to bring back the matte skin feel.
Step-by-Step Glue Method in Practice
When we tested this on a refurbished body with a one-inch (2.5 cm) split under the armpit, the repair itself took about eight minutes of active work. The honest surprise was the wait. We were tempted to handle it after an hour, but the seam only reached full strength after the overnight cure. Rushing that window is the most common way people reopen a fresh repair.
How Long TPE Glue Takes to Cure
TPE glue sets to the touch within a few minutes, becomes use-ready after several hours, and reaches full bond strength after about 24 hours. If you are filling a deeper tear with TPE paste instead, apply it in thin layers and wait at least 6 hours between each layer. Patience here is not optional. A seam that feels solid after 60 minutes can still split if you stretch it before the 24-hour mark.
💡 Pro tip: Warm the glue bottle in a cup of hot water for about 10 seconds before you apply it. The adhesive flows more evenly into the tear and gives you a smoother, less visible seam. Browse our TPE sex doll collection if you ever decide a heavily damaged body is beyond a home fix.
The Heat-Fusion Method for Stubborn Splits
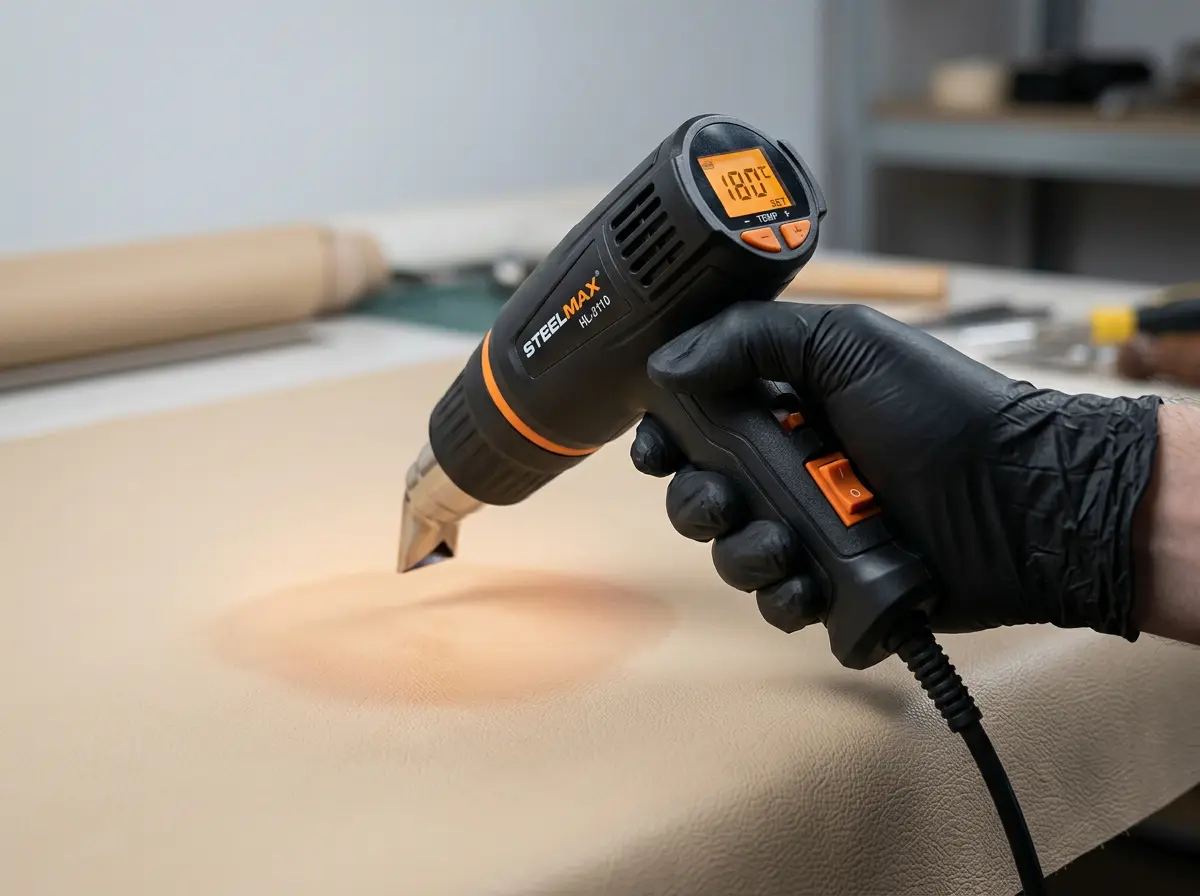
For splits that keep reopening or sit in a high-stress joint, heat fusion melts the two edges back into a single piece. This works because TPE is a thermoplastic. Apply gentle, controlled heat and the material flows together, then hardens as it cools. It is the closest thing to a seamless result, but it carries more risk, so treat it as the advanced option.
How to Use a Heat Gun or Soldering Iron Safely
Clean and degrease the tear first, exactly as you would for glue. Then move a temperature-controlled heat gun in slow circles about 3 to 5 inches (8 to 12 cm) away, warming the edges until the surface turns glossy and begins to fuse. Press the softened edges together with a gloved fingertip. A fine-tip soldering iron works for very small cuts, gently stroking the two sides until they melt into one. Let the area cool for 15 to 20 minutes, then oil and powder it.
Temperature Limits That Protect Your Doll
Keep your heat source in the 234 to 252°F (112 to 122°C) range and never exceed 275°F (135°C). Push past that and TPE bubbles, scorches, and discolors permanently. Use short cycles of 30 to 80 seconds and let the area rest between passes. Smaller and thinner sections, like mini dolls or fingers, need the lower end of that range and even shorter bursts.
⚠️ Safety first: Solvent glue and heated TPE both release fumes. Work in a well-ventilated room, wear a mask and nitrile gloves, and always test your method on a hidden patch, such as the inner thigh, before touching a visible area.
Mistakes That Ruin a Repair
Most failed TPE repairs come down to three avoidable errors: the wrong glue, a dirty surface, and too much heat. Steer clear of these and your fix will hold far longer.
Why Super Glue Usually Backfires
Ordinary cyanoacrylate super glue feels like a quick answer, but doll owners consistently report the same problems. It dries hard and crusty against soft TPE, often leaves an orange residue, and re-tears at the seam because it will not flex with the material. A gel super glue can work for a tiny, hidden nick in a pinch, yet for anything visible you want a proper TPE solvent glue that stays flexible.
Skipping the Degrease Step
TPE constantly bleeds a thin film of oil, and that film is invisible. Glue applied over it simply will not stick, no matter how long you press. Wiping the tear with 99% isopropyl alcohol to degrease it takes 30 seconds and roughly doubles how well the bond holds. For a stubborn oily spot, a cotton swab of acetone clears it, though use acetone sparingly since it is harsh on TPE.
How to Prevent Future Tears in Your Love Doll
Most tears in a TPE love doll happen at stress points during posing, storage, or cleaning, and nearly all of them are preventable. A few habits keep the material supple and the seams intact.
Support the Joints When You Pose or Move Her
The armpits, groin, elbows, and knees take the most strain, so support the limb whenever you change position rather than yanking it. Keep fingernails trimmed and filed to avoid nicking the skin. Store her lying flat or hanging without sharp bends in the joints, and keep her out of cold rooms, since TPE gets stiffer and tears more easily when it is cold.
Post-Repair Care and Re-Powdering
A repaired area stays slightly weaker than the original molded material, so give it a little extra care. Re-powder the whole body every few weeks to keep the surface soft, and re-oil the repaired seam so it does not dry out and crack. For the full routine, our complete TPE doll care guide covers cleaning, oiling, and storage schedules in one place. If you are shopping for a lower-maintenance body, a TPE torso doll has fewer joints and far fewer places to tear.
The key takeaway: A home repair contains and stabilizes damage, it does not fully restore the material. Done right, the seam holds for a long time. Done in a rush, over oily TPE or with the wrong glue, it reopens fast. The extra 15 minutes of prep is what separates the two outcomes.
Frequently Asked Questions
Yes. A small tear in a TPE doll is very fixable at home with TPE solvent glue and basic tools. Clean the area, apply a thin line of glue, press for 30 to 60 seconds, and let it cure. Deeper gouges may need TPE paste or the heat-fusion method.
Use a TPE-specific solvent glue, which lightly melts and fuses the torn edges so the repair stays flexible. Avoid ordinary super glue on visible areas, as it dries hard, can leave orange residue, and tends to re-tear at the seam.
TPE glue sets to the touch in a few minutes and becomes use-ready after several hours. Wait a full 24 hours before you stretch or stress the repaired spot so the bond reaches maximum strength. TPE paste needs about 6 hours between layers.
Yes. Because TPE is a thermoplastic, a temperature-controlled heat gun can fuse torn edges together. Keep it in the 234 to 252°F (112 to 122°C) range, never exceed 275°F (135°C), and use short cycles to avoid bubbling or discoloring the material.
Beyond a Simple Fix?
Some tears are too large to repair well at home. If your doll has reached that point, explore SweetieDoll for a body built to last, with responsive support after you buy.Shop SweetieDoll
📚 References
- TPE vs. Silicone Material Differences: Explains why TPE softens and can be heat-fused while silicone does not melt. Xometry
- Thermoplastic Elastomer Properties: Overview of TPE thermal sensitivity, solvent behavior, and discoloration with heat and UV. Xometry
- How TPE Responds to Heat: Manufacturer FAQ confirming that thermoplastic elastomers soften and melt when heated and are soluble in specific solvents. Avient
- Silicone Adhesive Cure Times: Technical bulletin for a common silicone adhesive, useful if your doll is silicone rather than TPE. Smooth-On
A note on safety and expectations: This guide is for at-home cosmetic repair of a product you own. TPE glue and heated TPE release fumes, so always work in a ventilated space, wear gloves and a mask, and test any method on a hidden area first. A home repair stabilizes and contains damage rather than fully restoring the material, and the repaired zone will remain slightly weaker than the original. Temperatures and cure times shown are general ranges drawn from material guidance and product instructions, not guarantees for every doll or glue. If a tear is very large or in a load-bearing area, consider professional repair.